
How do the sensor modules in my Coding for Good Kit work?
The Coding for Good Kit uses the same plug-and-play system as the Climate Action Kit, so if you have used our kits before, everything will feel familiar. The kit adds four brand-new smart modules — a Colour Sensor, a PIR Sensor, an LCD Screen and a Temperature Probe Sensor — on top of the sensors you already know.
This article walks through each module, what it senses (or shows), and how you and your students connect and code it.
The breakout board — the hub everything plugs into
The Breakout Board is the small circuit board that everything else plugs into — think of it as the power bar and translator for your project. Your micro:bit slides into the edge connector on the board, the board's built-in battery powers the project, and every sensor and motor talks to the micro:bit through it.
The board has separate groups of ports: ports for the white sensor modules, ports for the servo motors, and a dedicated connector for the water pump. Each port is marked with a symbol — match the symbol on the cable to the symbol on the port and you cannot go wrong. The cables are reversible, so there is no "wrong way round".
If a sensor seems like it isn't working, the first thing to check is that it is in a sensor port and not a motor port, and that the Breakout Board is charged and switched on.
The sensor and output modules in your kit
Every Coding for Good Kit ships with one of each module below, unless noted. (For the full parts list, see the Coding for Good Kit product page.)
Solar (light) sensor
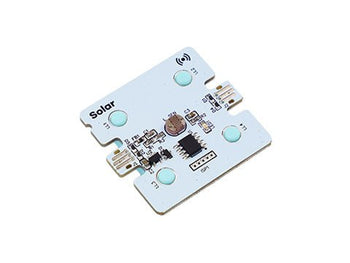
The concept. Light falling on a solar cell produces a small electrical output — more light, more output. That is exactly how a solar panel works, which makes this module a nice bridge between coding and renewable-energy lessons.
In practice. The module reports a light level your code can compare against a value. In our extension's example, an LED ring turns red when the light level drops to 40.
Classroom tip: have students read the value in a show number block first and walk around the room — window, hallway, under a desk — so they choose a threshold that suits your room instead of one from a worksheet.
Soil moisture sensor
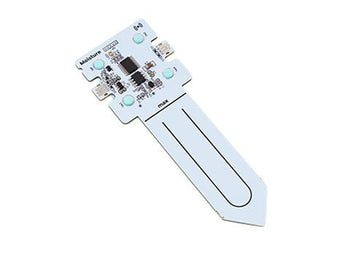
The concept. Water changes how easily electricity passes through soil. The probe measures that change and turns it into a moisture level — a dry pot reads low, a freshly watered pot reads high.
The module detects the percentage of moisture in a given medium, has two reversible cable ports, and works with any of our Climate Action Kits (moisture sensor product page). We don't sell this replacement part online — get in touch with us and we'll sort you out.
In practice. The most-used block asks a yes/no question — is the moisture past a threshold, under or over? — which is perfect for an if block. That's our auto-watering example: when the soil drops below 15, run the pump in bursts until the reading passes 42.
Classroom tip: insert the probe to a consistent depth. Two groups with the same soil can get different numbers simply because one pushed the probe in further. Keep the electronics end dry.
Line follower (infrared reflectance) sensor

The concept. The module shines infrared light down at the surface and measures how much bounces back. A pale surface reflects a lot; a matte black line reflects very little. It uses three reflected-light photoelectric sensors, so your robot can tell whether the line is under the left, centre or right of the module and steer accordingly. In the kit contents you'll find it listed as the infrared sensor, supplied with a ball caster.
In practice. Mount it facing the floor, a few millimetres above the surface, and pair it with the driving blocks (fwdMotors.setupDriving, drive, turn, stop) so the robot corrects its heading when the line moves away from the centre.
Classroom tip: lighting and tape matter more than code. Shiny floors, glossy tape and a strip of sunlight across the track all change the readings. If a robot wanders, see "Why is the line-following robot steering off-course?" before rewriting the program.
Sonar (distance) sensor

The concept. Sonar works by echo, the way a bat finds its way in the dark: the module sends out a pulse of ultrasound (sound too high-pitched for us to hear), waits for it to bounce off whatever is in front of it, and times how long the echo takes to come back. The longer the wait, the further away the object.
The module measures distance, has two reversible cable ports, and works with any of our kits (sonar sensor product page). Like the moisture sensor, we don't sell this replacement part online — contact us if you need one (part FE-04-0008). There's also a short setup video on our sonar sensor tutorial page.
In practice. The reading is a distance in metres, so a value of 0.5 means half a metre — not 50. You can read the raw distance with fwdSensors.sonar1.fwdDistance(), or ask the yes/no threshold question that suits an if block:
if (fwdSensors.sonar1.fwdDistancePastThreshold(0.5, fwdEnums.OverUnder.Under)) {
    fwdMotors.stop()
}
That's the pattern in our autonomous-vehicle example: when the sonar sees an obstacle closer than 0.5 m, the vehicle stops, turns to change direction, and reverses. Another example maps distances from 0 to 2.5 m onto the eight pixels of the LED ring, which is a nice way to make the reading visible.
Classroom tip: point the sensor at something flat and solid when students are testing. Soft, angled or very narrow objects scatter the echo and give jumpy readings — a hand or a piece of card works far better than a chair leg. Sonar shows up in Learning Platform lessons such as smart streetlights and smart warehouse vehicles, where students set their own trigger distance.
Touch sensor
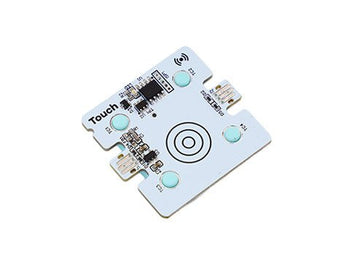
The concept. This is a capacitive sensor: it detects the tiny electrical change your finger makes when it comes close to the pad, rather than a mechanical switch being pressed. That means no moving parts to wear out — and it can trigger through a thin layer such as paper or a cardboard prototype.
In practice. It behaves like a button in code, with separate down and up events.
Classroom tip: use up (released) rather than down (pressed) for actions students shouldn't be able to fire repeatedly by holding a finger on the pad.
Dial (rotary encoder)

The concept. A rotary encoder is a knob that reports movement, not position: each click of rotation sends an event saying "one step clockwise" or "one step counter-clockwise". Unlike a volume knob with end stops, it turns forever — so your code keeps the running total. The module also includes a push button (Pitsco).
In practice. The event gives you a difference value — how many steps were turned — which you add to whatever you are controlling.
Classroom tip: the dial is the fastest way to let students tune a project live — a threshold, a speed, a brightness — without re-downloading code each time.
LED ring

The concept. The ring holds 8 addressable WS2812b LEDs (Pitsco). "Addressable" means each LED has its own address on a single data line, so one cable can control colour and brightness for every pixel independently — ideal for status displays, data visualisation and alarms.
In practice. The simplest block sets every pixel to one colour, given as a hex value (0xff0000 is red, 0x000000 is off):
fwdLights.ledRing1.setAllPixelsColor(0xff0000)
Classroom tip: ask students to turn a number into colour — green when a reading is healthy, red when it is not. It makes an invisible sensor value obvious from across the room during demos.
The four new modules
These four modules are new in the Coding for Good Kit, so they will not look familiar even if you have used a Climate Action Kit before.
TODO (photos): We don't yet have approved photos of the four new modules in the help centre image library, and the product-page images can't be linked from here. A human needs to upload a clear photo of each new module (Colour Sensor, PIR Sensor, LCD Screen, Temperature Probe Sensor) and insert it at the marked spot below, using the format
{width=50%}. Until then, students can compare their modules with the photos on the Coding for Good Kit product page.
Colour Sensor (new)

Detects colour, which opens up sorting and identification projects — recycling sorters, accessibility indicators, ripeness checkers and automated systems that respond to a colour cue.
TODO: Add the exact readings the Colour Sensor returns (named colours vs. RGB values), the recommended sensing distance, and the MakeCode blocks used.
PIR Sensor (new)

A passive infrared motion detector — it notices movement in front of it rather than measuring distance. Students use it for safety tools, wildlife counters, occupancy trackers and community alert systems.
LCD Screen (new)

An output module that displays text and numbers, so projects can show live readings, dashboards and alerts instead of scrolling everything across the micro:bit's 5x5 LED grid. It is a great prompt for students to think about how they communicate data to a user. It is also sometimes called a Character Screen. It is 20 columns of characters and has 2 rows (20x2).
TODO: Add the MakeCode blocks used to write and clear text on the LCD Screen.
Temperature Probe Sensor (new)

A probe you can place in air, soil or liquid to measure temperature — useful for water-quality investigations, food-safety projects, composting, greenhouses and indoor/outdoor climate comparisons.
TODO: Add the probe's measuring range and accuracy, the units reported in MakeCode, and confirm whether the probe tip is safe for full immersion in water.
Motors and the water pump
Your kit also includes 2 continuous servo motors, 2 positional servo motors, and a peristaltic water pump with tubing (an upgraded pump designed for longer, continuous or intermittent water flow). These plug into the motor ports and pump connector rather than the sensor ports.
For the difference between the two motor types, see the existing articles "What is the difference between a Positional and Continuous Servo motors?" and "How do I know my servo motors are connected to right ports?".
How to connect a module
- Make sure the Breakout Board is charged, and slide your micro:bit into the edge connector.
- Pick a cable that reaches comfortably — short cables for compact builds, long cables or an extender for arms and towers.
- Plug one end into the module and the other into a port on the Breakout Board, matching the symbol on the port.
- Attach the module to your build using the building blocks on the back of the module.
- Switch the Breakout Board on and run your code.
There is no soldering, no wiring diagram and no polarity to worry about — students can swap modules mid-lesson without breaking anything.
Coding the modules in MakeCode
These modules are "smart": they report live values back to MakeCode, so students can watch a reading change on screen while they move, touch or cover a sensor.
To get the blocks, add the Forward Education extension in MakeCode. See the existing article "How to add the Forward EDU Extension in MakeCode" for the steps, and "Do I have the latest version of the Forward Education Coding blocks?" if your new modules do not appear — the four new Coding for Good modules need an up-to-date extension.
Once the extension is added, each module gets its own blocks — a reading block for inputs (moisture, light, distance, colour, motion, temperature) and control blocks for outputs (LED Light, LCD Screen, motors, pump).
A few things worth telling students up front:
- Pair the micro:bit with MakeCode before downloading code, or you will be dragging .hex files by hand. See "Pairing your micro:bit in MakeCode".
- If they swap to a different computer or a different micro:bit, they will need to pair again.
- The Coding for Good Kit works with every Climate Action Kit lesson, so any code your class wrote last year still runs.
If a module isn't responding
- Check the Breakout Board is charged and switched on.
- Reseat both ends of the cable, and try a different cable — a cable is the most common culprit.
- Make sure the module is in a sensor port, not a motor port.
- Try the module in a different port to rule out a damaged port.
- Confirm the Forward Education extension is up to date and that you downloaded the code to the micro:bit after your last change.
Still stuck? See "A piece is missing from my kit — how do I get a replacement?" or "How do I contact support?".