
How do the sensor modules in my Climate Action Kit work?
Every sensor and output module in your Climate Action Kit plugs into the same hub (the breakout board) and speaks the same language (Jacdac), so once you understand one module, the rest follow the same pattern.
Here's the short version for each module: what it senses, how it senses it, and what you do in MakeCode.
Before you start: the pattern that applies to every module
- Plug the module into a port on the breakout board with one of the kit's cables. The cables and ports are not keyed, so they can go in either way.
- Turn on the breakout board and make sure a micro:bit V2 is seated in the edge connector. The kit does not work with a V1 micro:bit — see "Why does the Climate Action Kit only work with the v2 micro:bit?".
- In MakeCode, add our Forward Education extension (see "How to add the Forward EDU Extension in MakeCode"). The
fwdSensors,fwdMotorsandfwdLightsblock categories appear in the toolbox. - Drag out the block for your module, download to the micro:bit, and pair when prompted.
Because the modules are Jacdac devices, they identify themselves to the board — you do not need to tell your code which port you used. If you have more than one of the same module, the blocks are numbered (for example soilMoisture1, dial1, ledRing1).
The breakout board — the hub everything plugs into
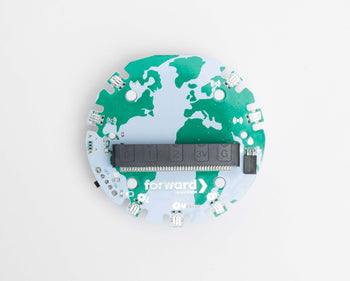
A breakout board is a circuit board that "breaks out" the micro:bit's small edge connector into full-size, labelled ports you can safely plug things into.
The breakout board is the hub for every Climate Action Kit project. The micro:bit slides into the edge connector, and the board passes your code's instructions out to the sensors and motors, and passes sensor readings back in. It's built to be programmed with our extension in MakeCode (product page).
The board runs on a 3.7 V, 1500 mAh rechargeable lithium-ion battery that charges over micro USB, and gives you 4 sensor ports, 3 motor ports and 1 water pump port, for use with micro:bit V2 and newer. Sensors go in sensor ports, servo motors go in motor ports, and the water pump goes in the water pump port — the ports aren't interchangeable (Breakout Board & Components).
Classroom tip: the board is also the power source for the modules, so if several sensors go quiet at once, charge the board before you troubleshoot anything else. See "How long does the Climate Action Kit Breakout Board battery last?"
Solar (light) sensor
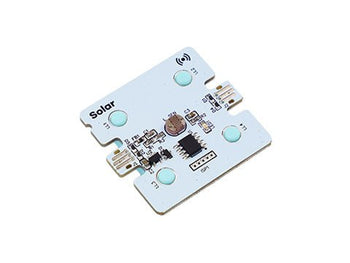
The concept. Light falling on a solar cell produces a small electrical output — more light, more output. That is exactly how a solar panel works, which makes this module a nice bridge between coding and renewable-energy lessons.
In practice. The module reports a light level your code can compare against a value. In our extension's example, an LED ring turns red when the light level drops to 40.
Classroom tip: have students read the value in a show number block first and walk around the room — window, hallway, under a desk — so they choose a threshold that suits your room instead of one from a worksheet.
Soil moisture sensor
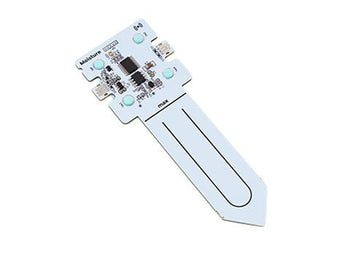
The concept. Water changes how easily electricity passes through soil. The probe measures that change and turns it into a moisture level — a dry pot reads low, a freshly watered pot reads high.
The module detects the percentage of moisture in a given medium, has two reversible cable ports, and works with any of our Climate Action Kits (moisture sensor product page). We don't sell this replacement part online — get in touch with us and we'll sort you out.
In practice. The most-used block asks a yes/no question — is the moisture past a threshold, under or over? — which is perfect for an if block. That's our auto-watering example: when the soil drops below 15, run the pump in bursts until the reading passes 42.
Classroom tip: insert the probe to a consistent depth. Two groups with the same soil can get different numbers simply because one pushed the probe in further. Keep the electronics end dry.
Line follower (infrared reflectance) sensor

The concept. The module shines infrared light down at the surface and measures how much bounces back. A pale surface reflects a lot; a matte black line reflects very little. It uses three reflected-light photoelectric sensors, so your robot can tell whether the line is under the left, centre or right of the module and steer accordingly. In the kit contents you'll find it listed as the infrared sensor, supplied with a ball caster.
In practice. Mount it facing the floor, a few millimetres above the surface, and pair it with the driving blocks (fwdMotors.setupDriving, drive, turn, stop) so the robot corrects its heading when the line moves away from the centre.
Classroom tip: lighting and tape matter more than code. Shiny floors, glossy tape and a strip of sunlight across the track all change the readings. If a robot wanders, see "Why is the line-following robot steering off-course?" before rewriting the program.
Sonar (distance) sensor

The concept. Sonar works by echo, the way a bat finds its way in the dark: the module sends out a pulse of ultrasound (sound too high-pitched for us to hear), waits for it to bounce off whatever is in front of it, and times how long the echo takes to come back. The longer the wait, the further away the object.
The module measures distance, has two reversible cable ports, and works with any of our kits (sonar sensor product page). Like the moisture sensor, we don't sell this replacement part online — contact us if you need one (part FE-04-0008). There's also a short setup video on our sonar sensor tutorial page.
In practice. The reading is a distance in metres, so a value of 0.5 means half a metre — not 50. You can read the raw distance with fwdSensors.sonar1.fwdDistance(), or ask the yes/no threshold question that suits an if block:
if (fwdSensors.sonar1.fwdDistancePastThreshold(0.5, fwdEnums.OverUnder.Under)) {
    fwdMotors.stop()
}
That's the pattern in our autonomous-vehicle example: when the sonar sees an obstacle closer than 0.5 m, the vehicle stops, turns to change direction, and reverses. Another example maps distances from 0 to 2.5 m onto the eight pixels of the LED ring, which is a nice way to make the reading visible.
Classroom tip: point the sensor at something flat and solid when students are testing. Soft, angled or very narrow objects scatter the echo and give jumpy readings — a hand or a piece of card works far better than a chair leg. Sonar shows up in Learning Platform lessons such as smart streetlights and smart warehouse vehicles, where students set their own trigger distance.
Touch sensor
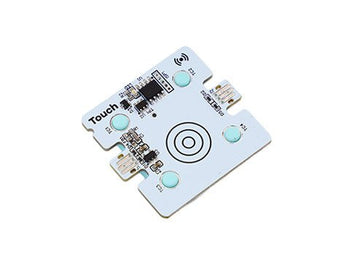
The concept. This is a capacitive sensor: it detects the tiny electrical change your finger makes when it comes close to the pad, rather than a mechanical switch being pressed. That means no moving parts to wear out — and it can trigger through a thin layer such as paper or a cardboard prototype.
In practice. It behaves like a button in code, with separate down and up events.
Classroom tip: use up (released) rather than down (pressed) for actions students shouldn't be able to fire repeatedly by holding a finger on the pad.
Dial (rotary encoder)

The concept. A rotary encoder is a knob that reports movement, not position: each click of rotation sends an event saying "one step clockwise" or "one step counter-clockwise". Unlike a volume knob with end stops, it turns forever — so your code keeps the running total. The module also includes a push button (Pitsco).
In practice. The event gives you a difference value — how many steps were turned — which you add to whatever you are controlling.
Classroom tip: the dial is the fastest way to let students tune a project live — a threshold, a speed, a brightness — without re-downloading code each time.
LED ring

The concept. The ring holds 8 addressable WS2812b LEDs (Pitsco). "Addressable" means each LED has its own address on a single data line, so one cable can control colour and brightness for every pixel independently — ideal for status displays, data visualisation and alarms.
In practice. The simplest block sets every pixel to one colour, given as a hex value (0xff0000 is red, 0x000000 is off):
fwdLights.ledRing1.setAllPixelsColor(0xff0000)
Classroom tip: ask students to turn a number into colour — green when a reading is healthy, red when it is not. It makes an invisible sensor value obvious from across the room during demos.
If a module doesn't respond
- Check the cable is fully clicked in at both ends and try a different port.
- Confirm the breakout board is charged and switched on, and that the micro:bit is fully seated.
- Re-download your program and re-pair the micro:bit — after a firmware or extension update, students often need to pair again. See "Pairing your micro:bit in MakeCode".
- Make sure you're on the current extension version — see "Do I have the latest version of the Forward Education coding blocks?"
- Still stuck? We're happy to help — see "How do I contact support?"
Where to go next
- Browse our extension's examples and block reference at pxt-fwd-edu on MakeCode.
- Watch our short per-module setup videos on the tutorials page.
- Source code for the blocks lives in our climate-action-kits GitHub organisation.
- Lesson plans that use each module are in the Learning Platform — see "How do I access lessons for the Climate Action Kit?"
- Replacement modules and full module photos are in our store — for example the moisture sensor, the sonar sensor and the breakout board.