Integrating microbit-apps.org with Forward Education CodeCTRL Display Shields
The microbit-apps.org website, developed by the Micro:bit Innovation and Research Lab (MIRL) at Lancaster University, provides two educational applications that extend the functionality of the micro:bit display shields (also known as Arcade shields) used in your CodeCTRL kits. These apps are designed to work with the display shield extension in the MakeCode for micro:bit editor.
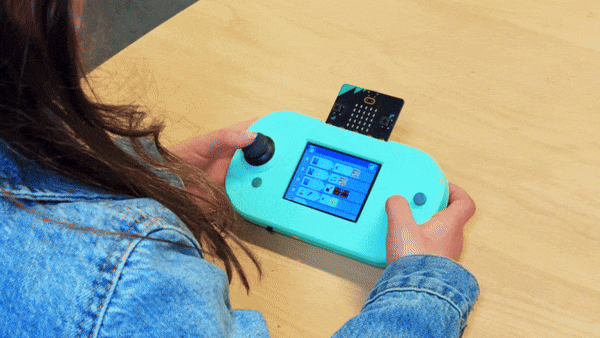
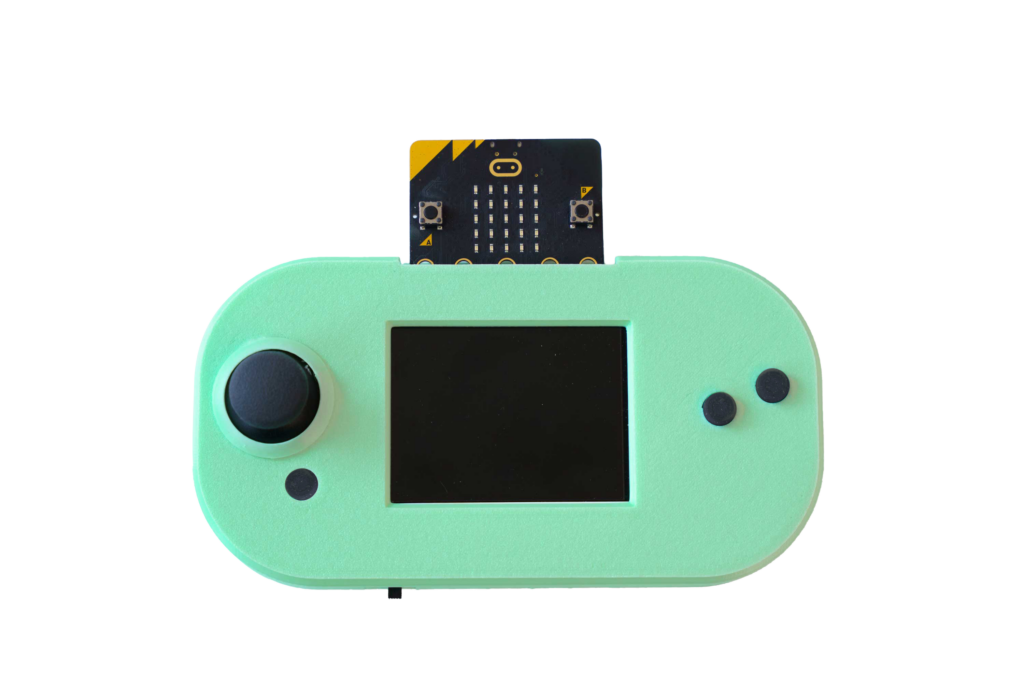
The display shield is a core component of CodeCTRL kits, enabling its use for applications beyond traditional arcade-style games.
The Display Shield Extension
The display shield extension enables the use of Arcade shields with the MakeCode for micro:bit editor. It provides:
- Access to the color display and buttons on the shield.
- A Bitmap abstraction with numerous drawing primitives (e.g., drawing lines, circles, and squares).
- A simulator for the display to test code during development.
You can find the extension on the MakeCode platform: display-shield MakeCode extension.
Available Applications
| Application | Core Functionality | Educational Value & Subject Area |
|---|---|---|
| MicroCode | On-Device Programming: Allows students to program the micro:bit directly on the device. The display shield is used as a visual, tile-based programming editor with tooltips. | Promotes accessible, immediate coding and logic development on the micro:bit hardware. |
| MicroData | Live Sensor Data: Enables the live visualization and recording of the micro:bit's built-in sensor data. | Supports data collection and analysis in Physics, Environmental Science, and Sports curricula. |
Future Features
The following features are planned for future updates to the MicroCode app:- Support for external Jacdac devices.
- Support for radio-controlled robot cars.
- Language localization.
External Resource
For detailed information on the Jacdac protocol, please refer to the official documentation: jacdac-docs
Downloding MicroCode to your CodeCTRL
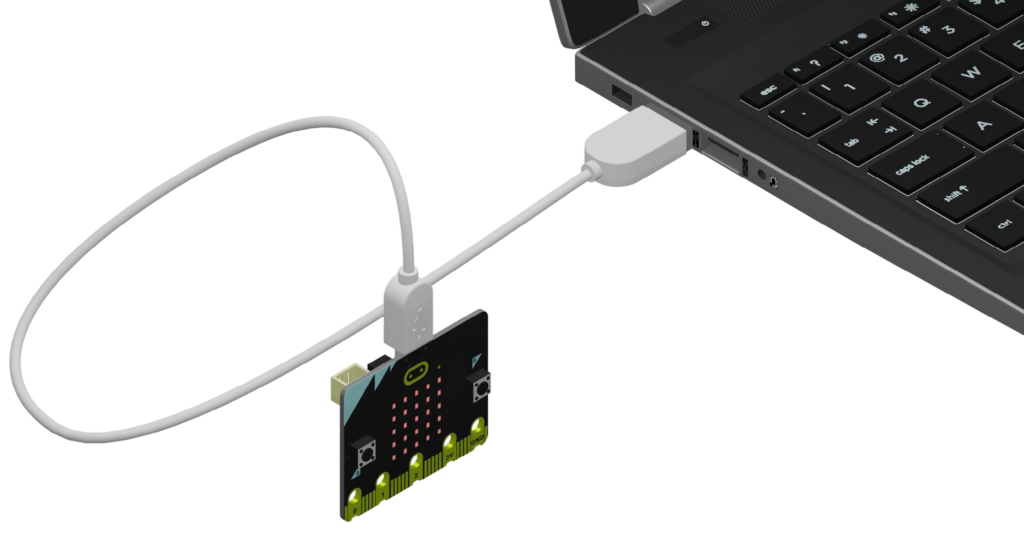
Step 1: Connect your micro:bit to the computer
Plug the smaller end of a microUSB cable into the USB port on your micro:bit.
Plug the larger, standard USB end into a USB port on your computer.
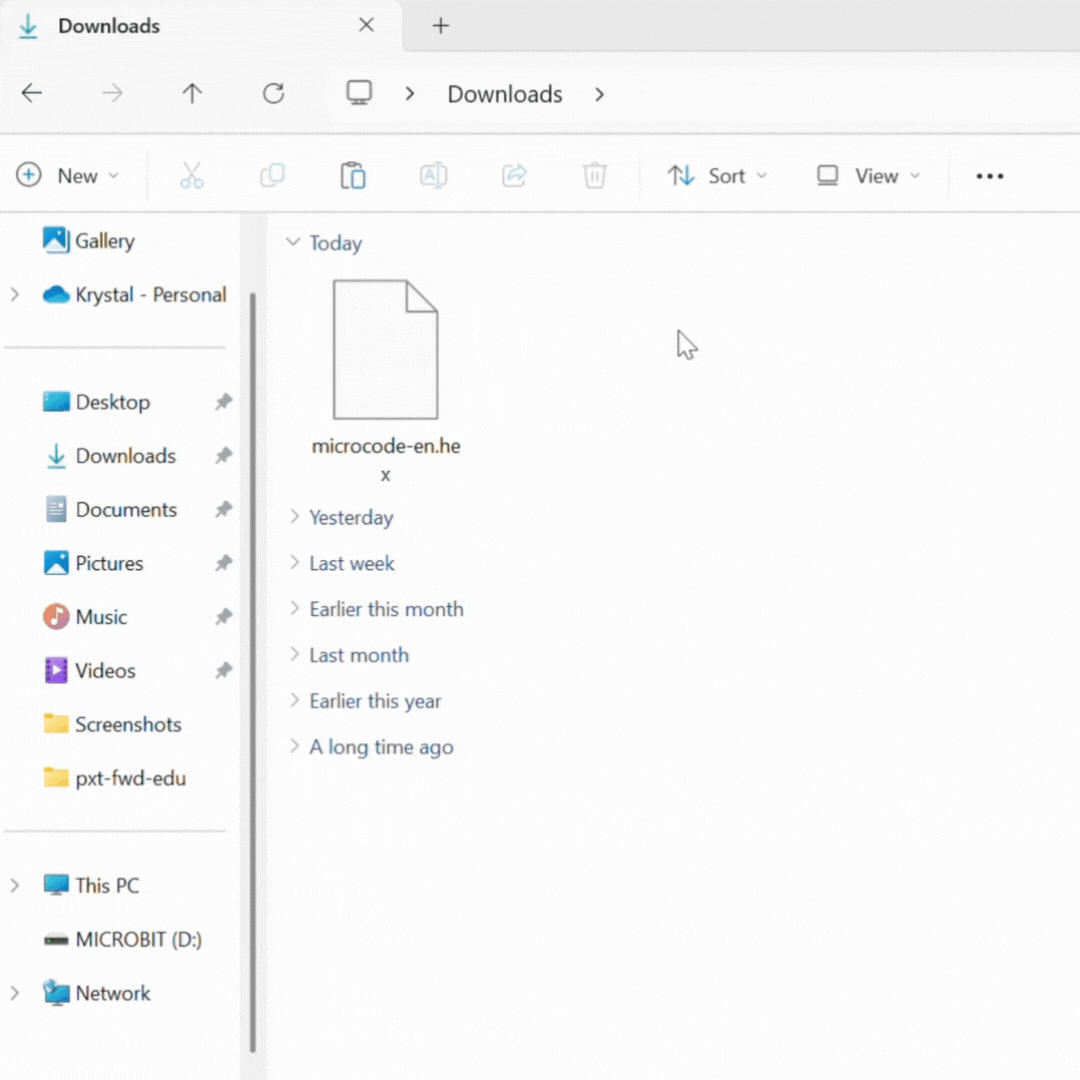
Step 2: Transfer the MicroCode .hex file to your micro:bit
Download the MicroCode .hex file to your computer.
Then, open your computer’s file explorer (Windows) or Finder (Mac) to locate the .hex file in your “Downloads” folder.
Drag and drop the .hex file onto the “MICROBIT” drive. Wait for the file transfer to complete.
Step 3: Eject your micro:bit
Safely eject your micro:bit from your computer to avoid damaging it:
- On Windows: Right-click on the “MICROBIT” drive icon in File Explorer and select “Eject”.
- On macOS: Drag the “MICROBIT” drive icon from your desktop to the Trash (which will change to an “Eject” icon).
Disconnect the microUSB cable from your computer and micro:bit.
Step 4: Connect micro:bit to CodeCTRL
Gently slide the pins of your micro:bit into the edge connector at the top of the CodeCTRL. Be sure the the buttons on the micro:bit are facing forward! You should feel a slight click or resistance when it’s properly connected.
Step 5: Power up and code!
Locate the power switch on the bottom left of your CodeCTRL. Toggle it on and MicroCode should automatically load!